A straightforward easy guide on how to transfer your iTunes playlist, or entire library, to Spotify. This also works for other services like Tidal, Google Music, Amazon Music, Youtube Music, Apple Music.
What you will do is export your iTunes music and import it into Spotify.
Did you spend years building a massive music iTunes library long before the days of streaming services? So did I. Fear not, this is the way to save your large music library into Spotify. I imported over 7,000 songs at once.
How to move an iTunes library to Spotify
Let’s move an old playlist from iTunes to Spotify:
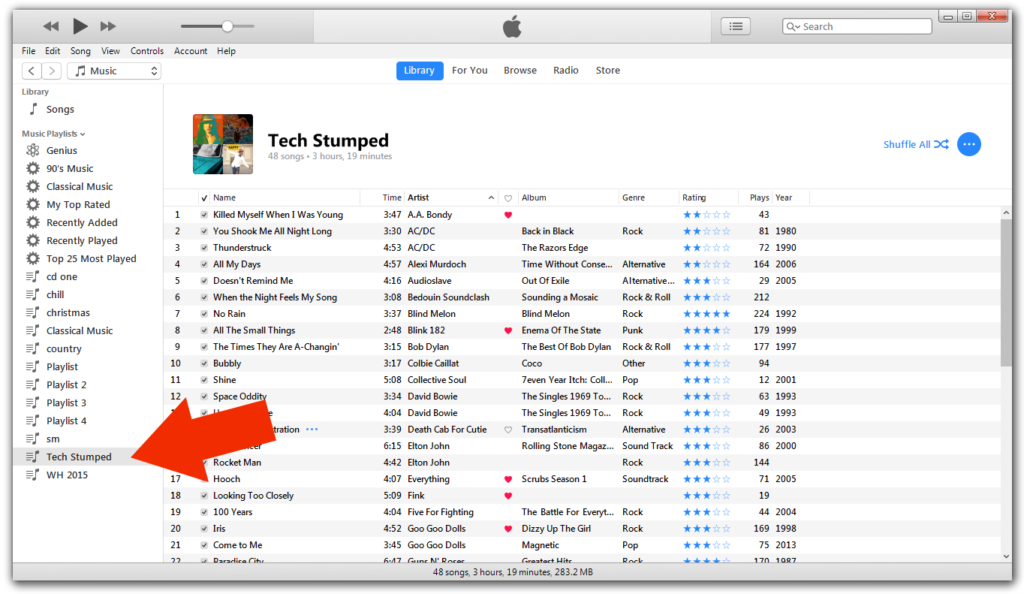
- Open up iTunes and select your desired playlist. You can also move your entire library at once if you prefer. I’m going to move this playlist called “Tech Stumped” over.
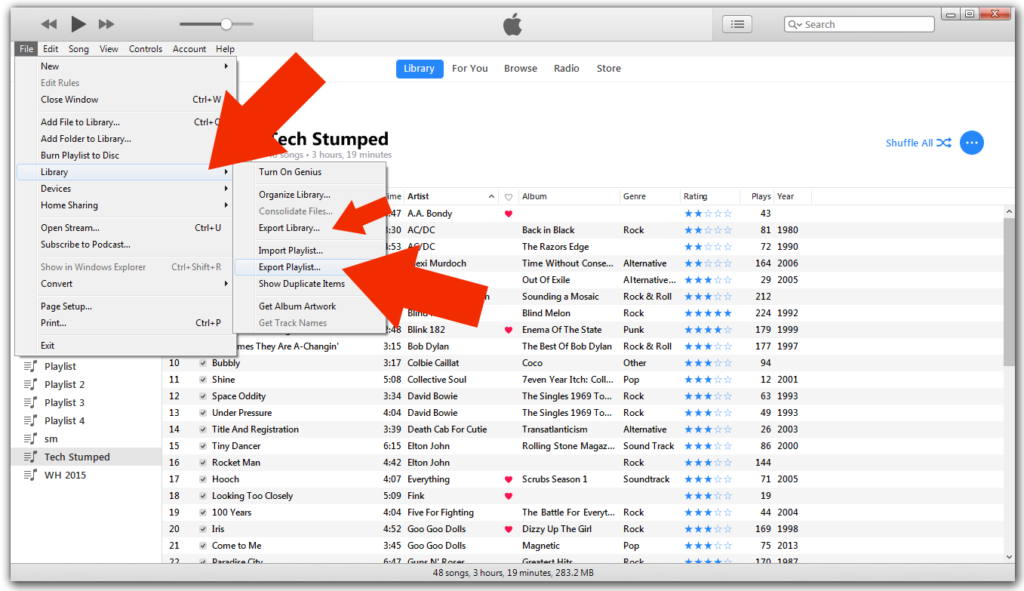
- Next go to File at the top. Hover over Library, then select “Export Playlist…”
You could also choose to “Export Library…” if you want to do everything at once but, be warned, you will lose your playlist sorting.
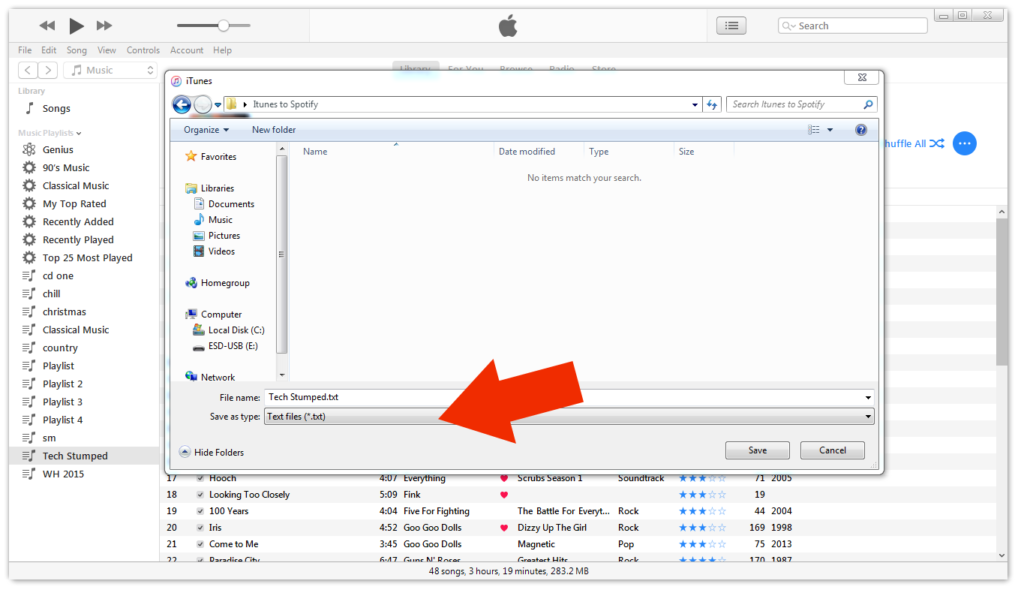
- From the Save As window, choose your location and make sure the “Save as type:” is set to “Text files (*.txt)”
- Next, we need to prepare this text file so it will import the iTunes playlist into Spotify without any errors.
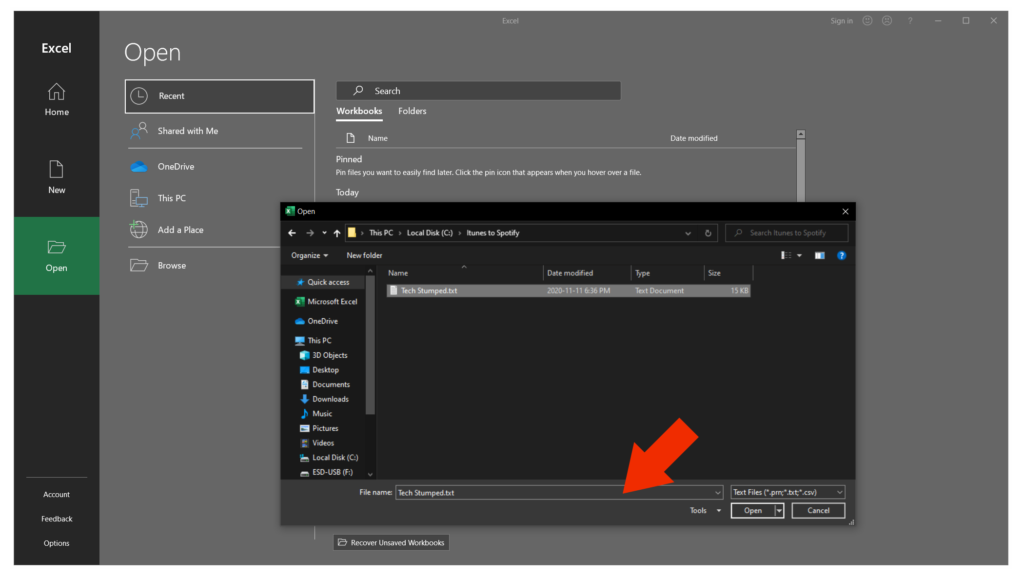
- Open Microsoft Excel, or your favorite to spreadsheet program. From there, go to File, then Open, and find the .txt file from before.
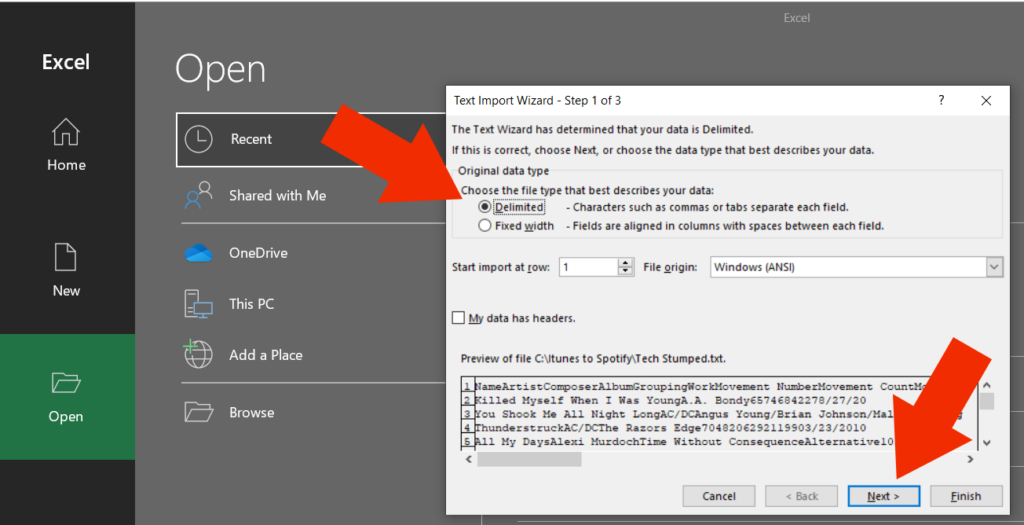
- When you hit Open a new window will pop open. In this “Text Import Wizard” make sure that under Original data type the “Delimited” option is chosen. Then click Next.
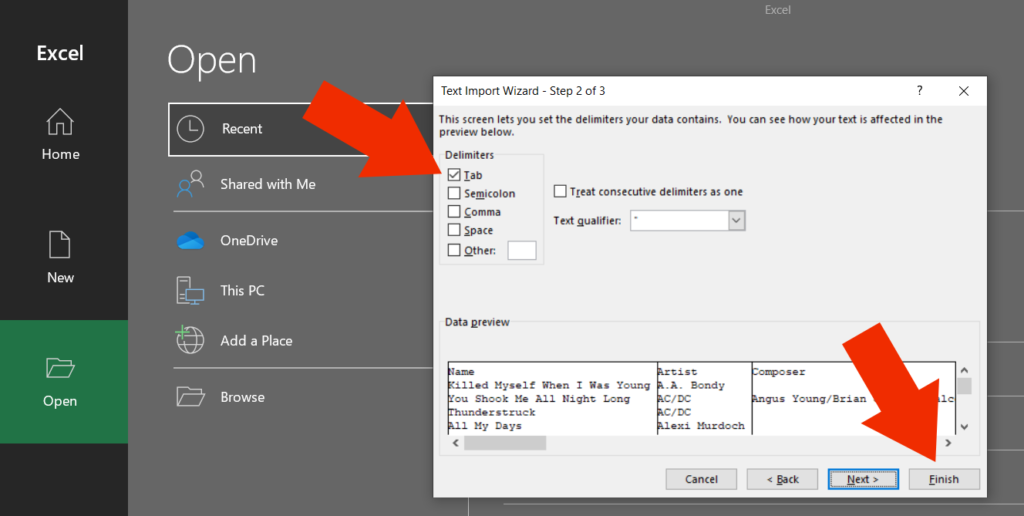
- From the second step in the Text Import Wizard make sure Delimiters is set as “Tab”. Then, you can click “Finish”.
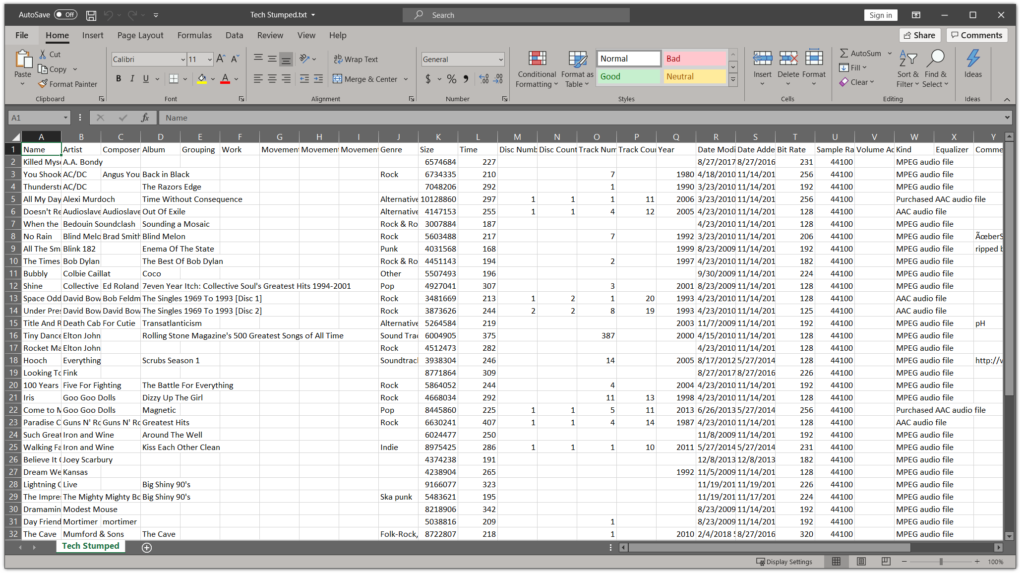
- Your playlist should open up as a messy spreadsheet.
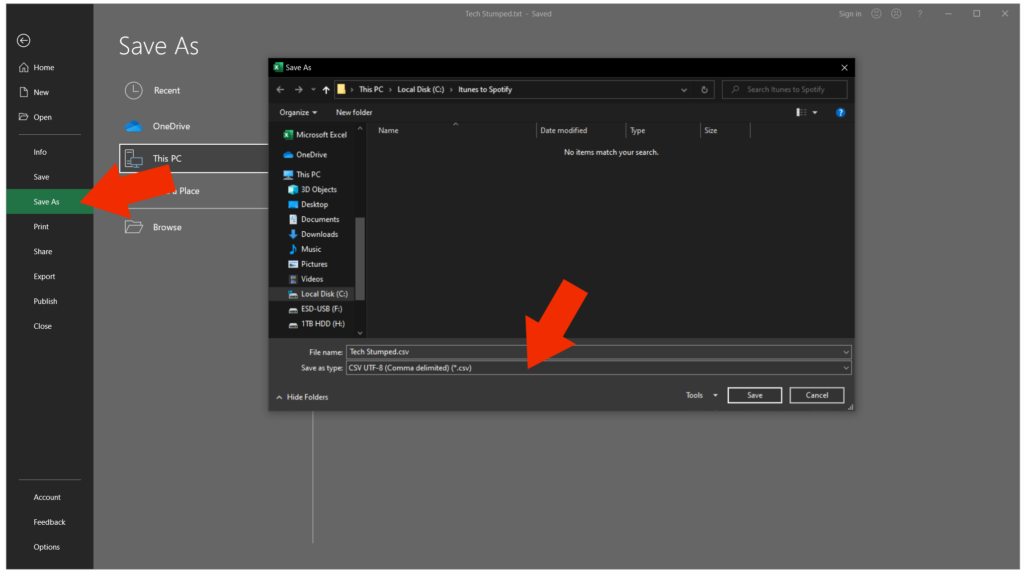
- Go to File, and then Save As. From the Save As popup window, change the “Save as type:” to “CSV UTF-8 (Comma delimited) (*.csv)”. You might have a slightly different .csv option, but it should work just the same.
- Now your old .txt file could be deleted, but I would keep it as a backup.
- Time to clean up this mess. You only really need 2 columns to be able to copy your old iTunes library over to Spotify: Song Name, and Artist.
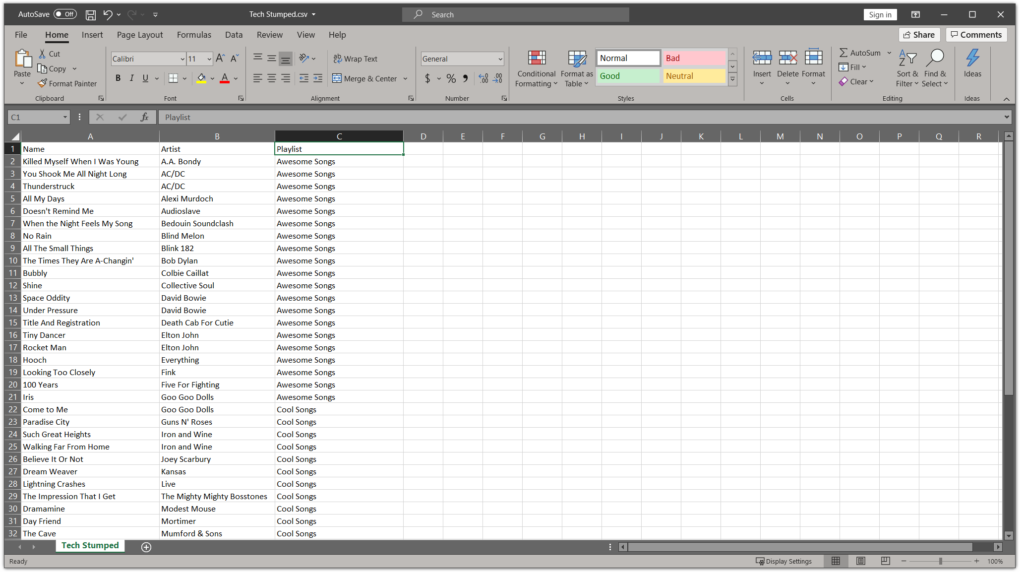
You can also keep a third column if you want to use it to break up your song list into different Spotify playlists. You could use your old star rating column for instance.
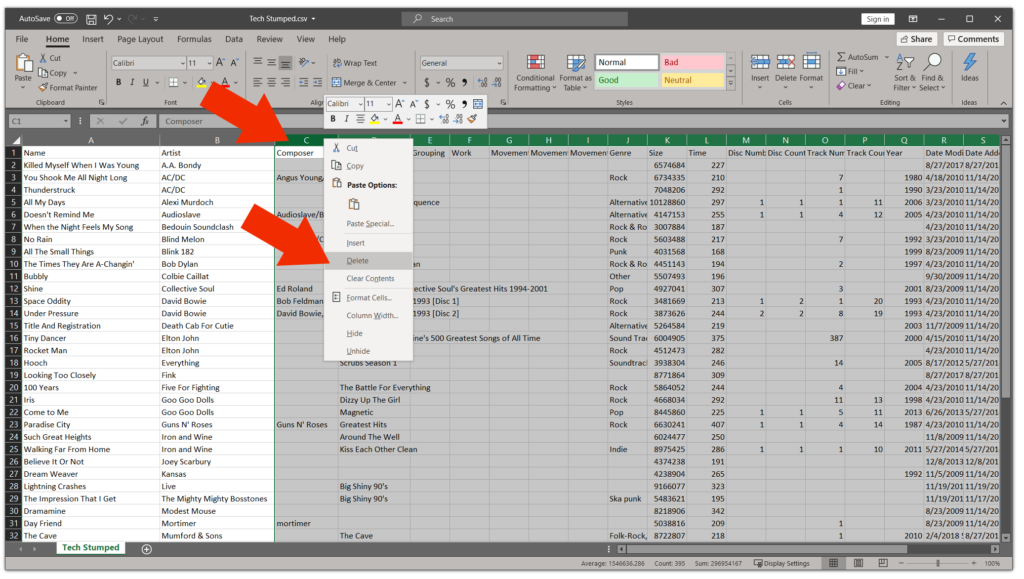
Now you can delete all the other columns. - To delete the extra columns, you can click and drag across the top column letters to select them all and then right click a letter and go to delete.
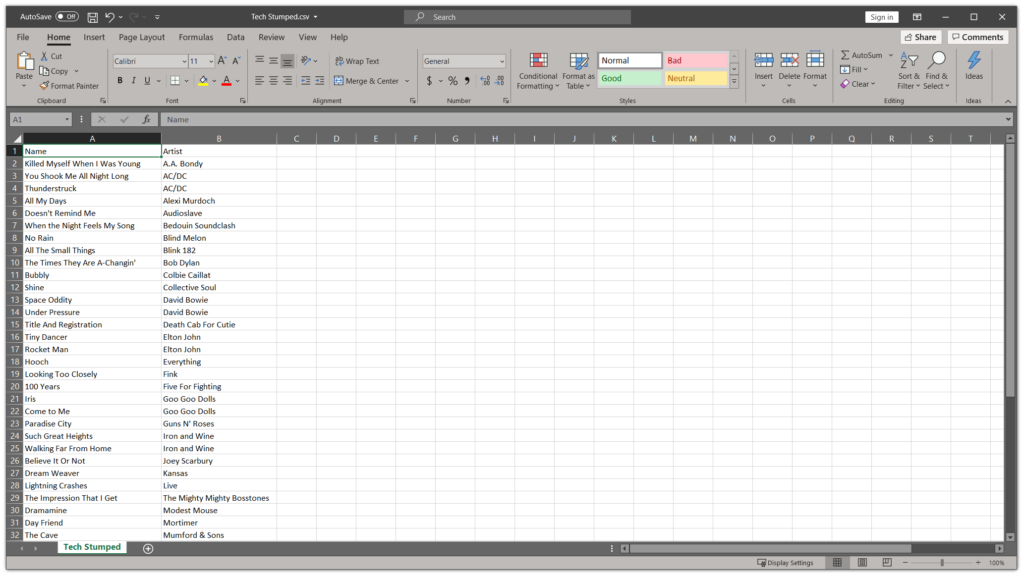
- Now you’re left with just song names and artists.
- If you want to split this library up as you import the spreadsheet into Spotify, you can add a third column named Playlist and use it to organize your songs.
- Save your file. You can close Excel now.
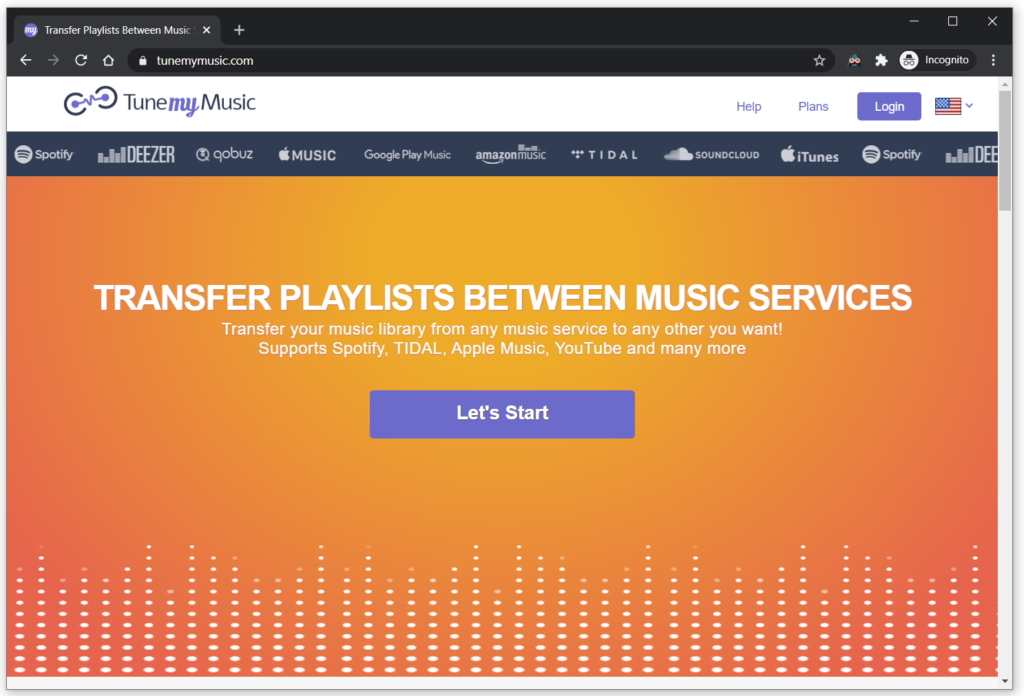
- Now time for the secret sauce. Head over to tunemymustic.com and don’t worry, it’s totally free, you don’t even have to make an account. Click the big “Let’s Start” button.
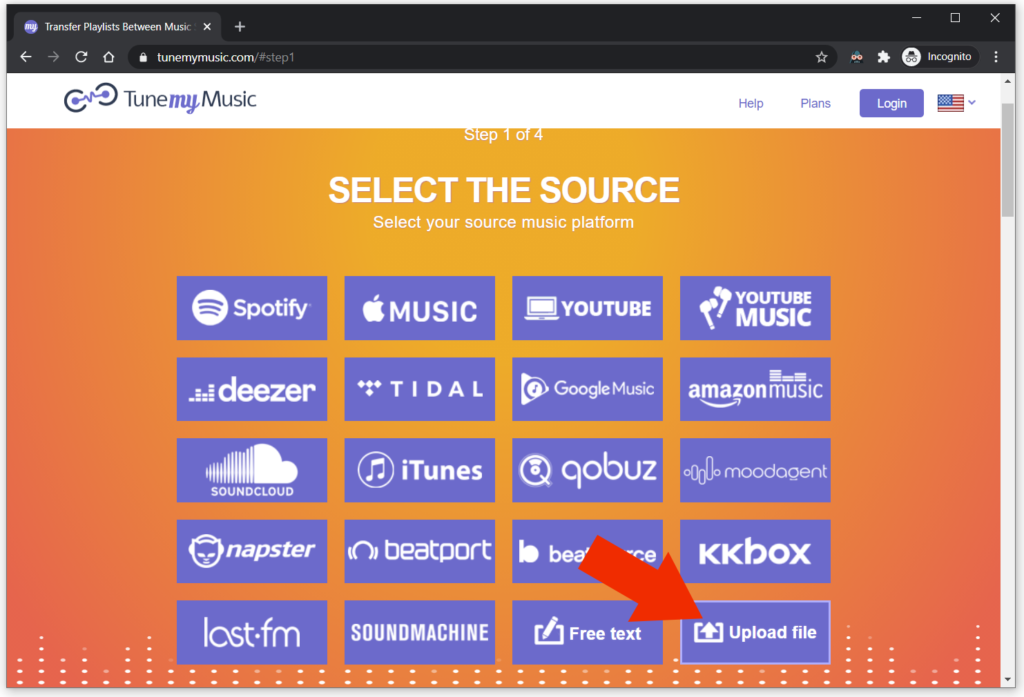
- Next, we Select the Source from the bottom right choose “Upload file”
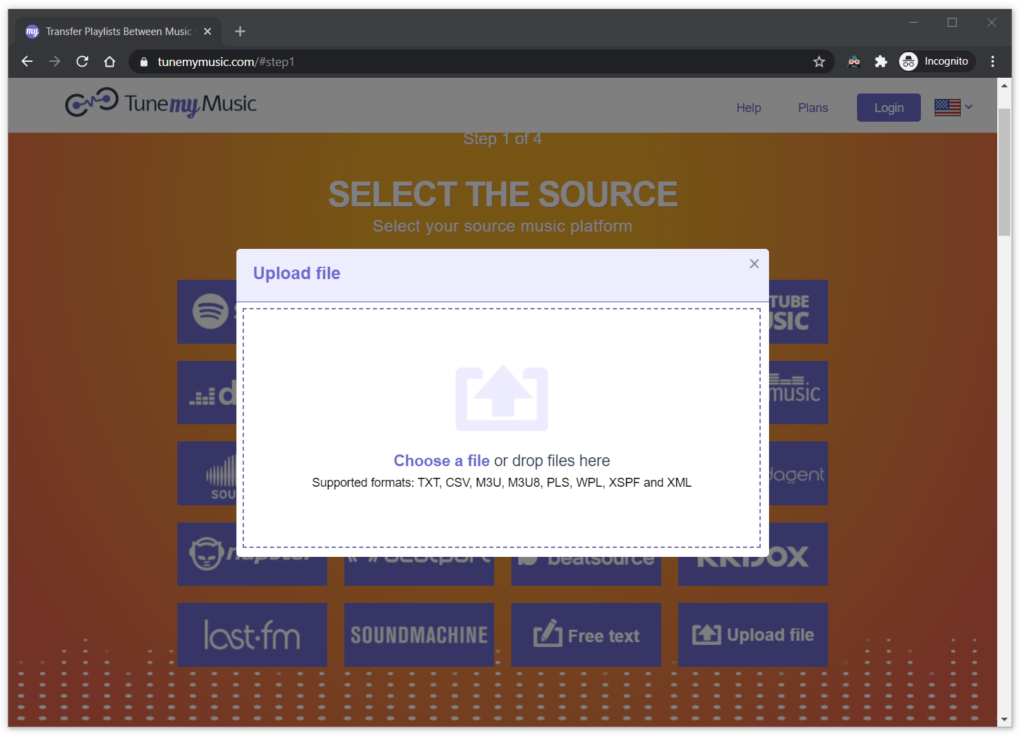
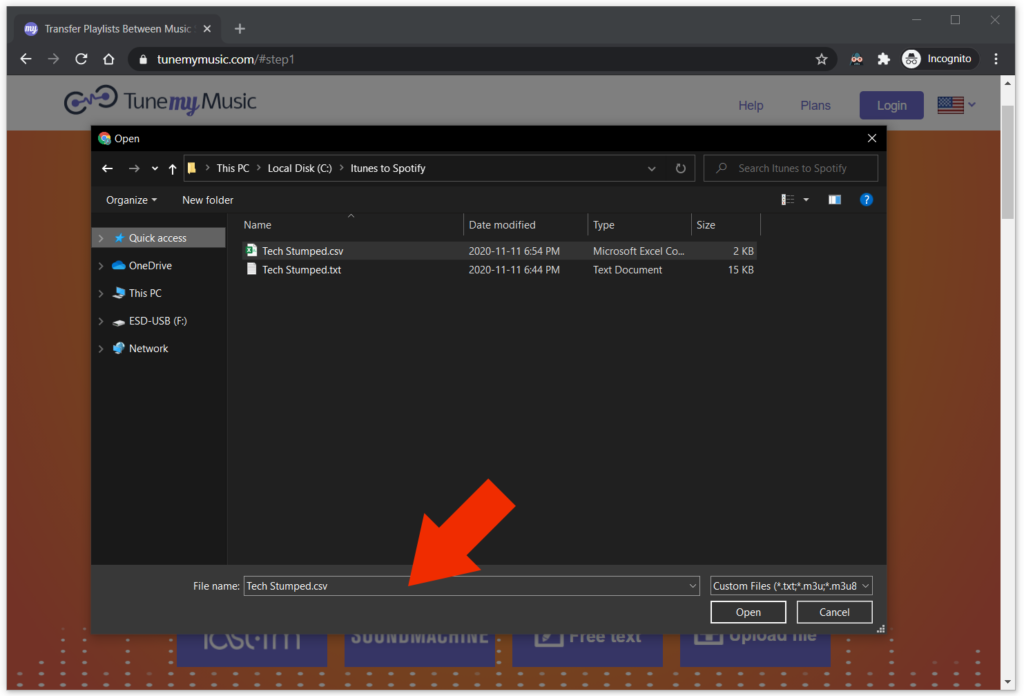
- A window will popup so you can drag and drop or choose your .csv iTunes playlist file you want to import into Spotify.
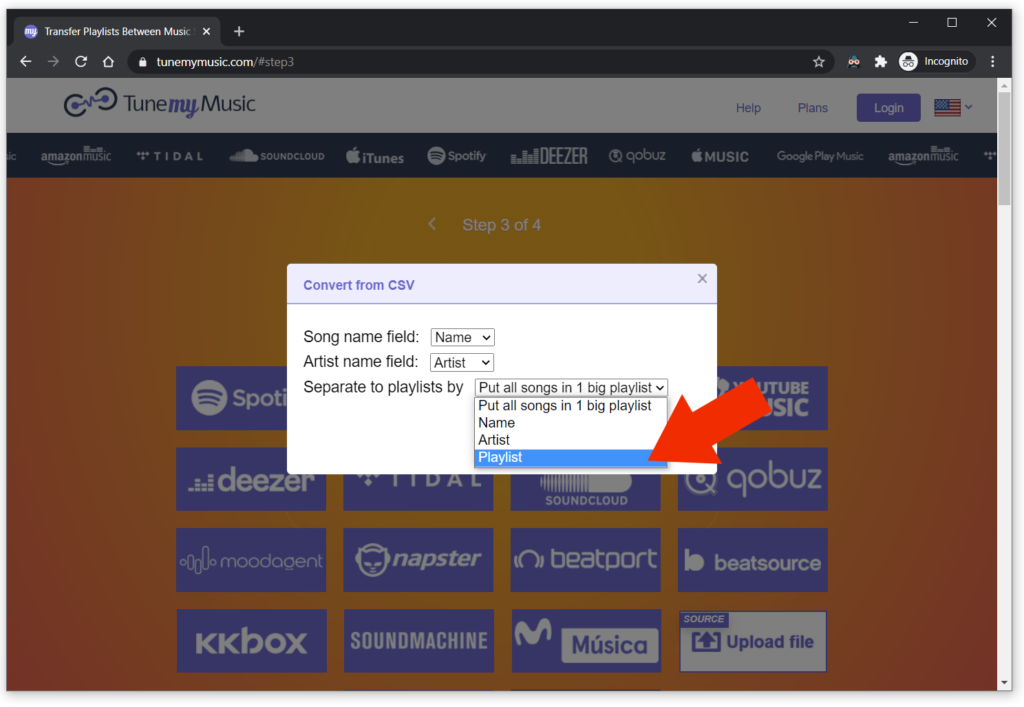
- The next popup has three options that need setting: Song Name, Artist, and Separate to playlists by. The options in the drop-down boxes are based on the first row of your .csv file.
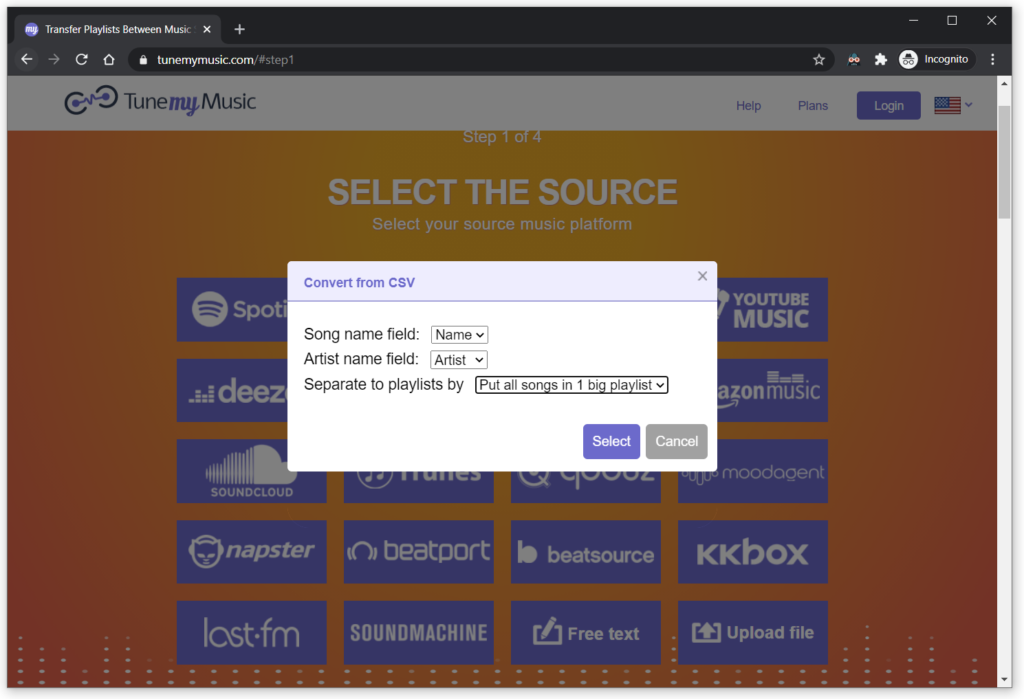
- If you are importing a single playlist choose “Put all songs in 1 big playlist” for the bottom playlist option. If you are importing multiple playlists at once, choose the Playlist column we created earlier. Then hit Select to close the popup window.
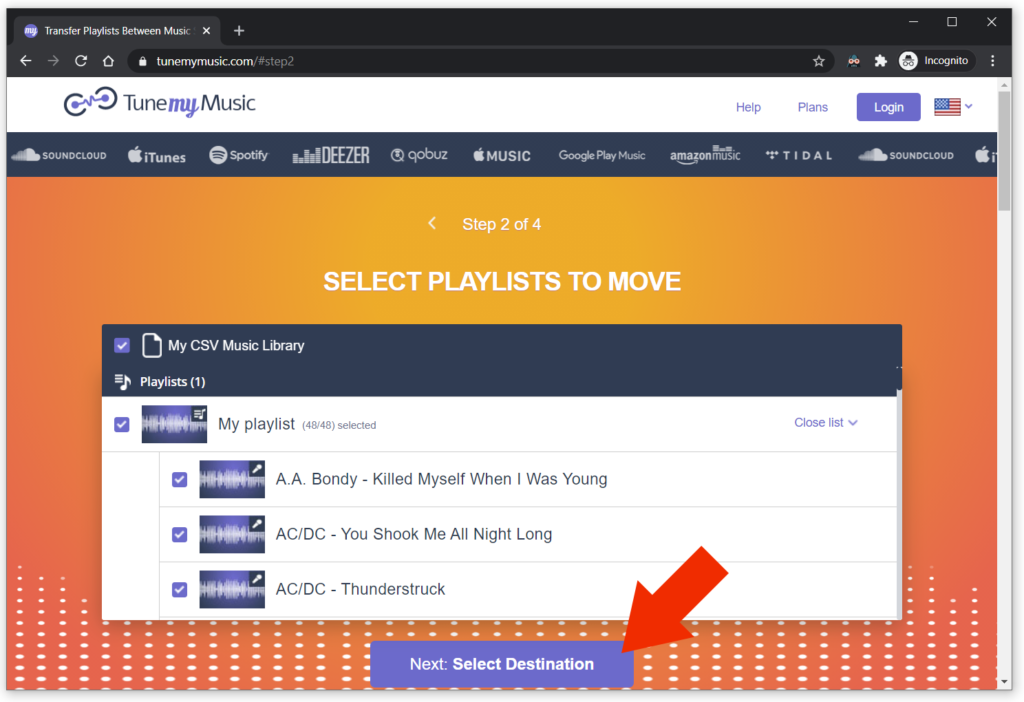
- Hit the big button: “Next: Select Destination”
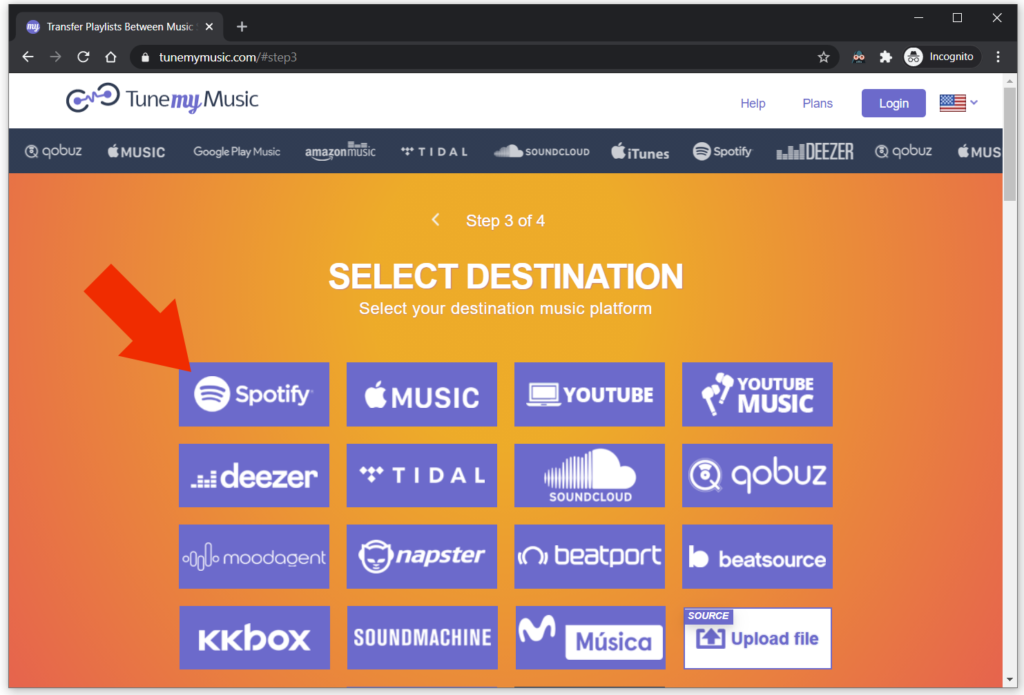
- Here we’re going to choose to import the old music library into Spotify.
As you can see there are a lot of other music streaming services to upload your old iTunes playlist to if you want: Tidal, Google Music, Amazon Music, Youtube Music, Apple Music, SoundCloud, Last FM, SoundMachine, beatport, kkbox, beatsource, Napster, moodagent, qobuz.
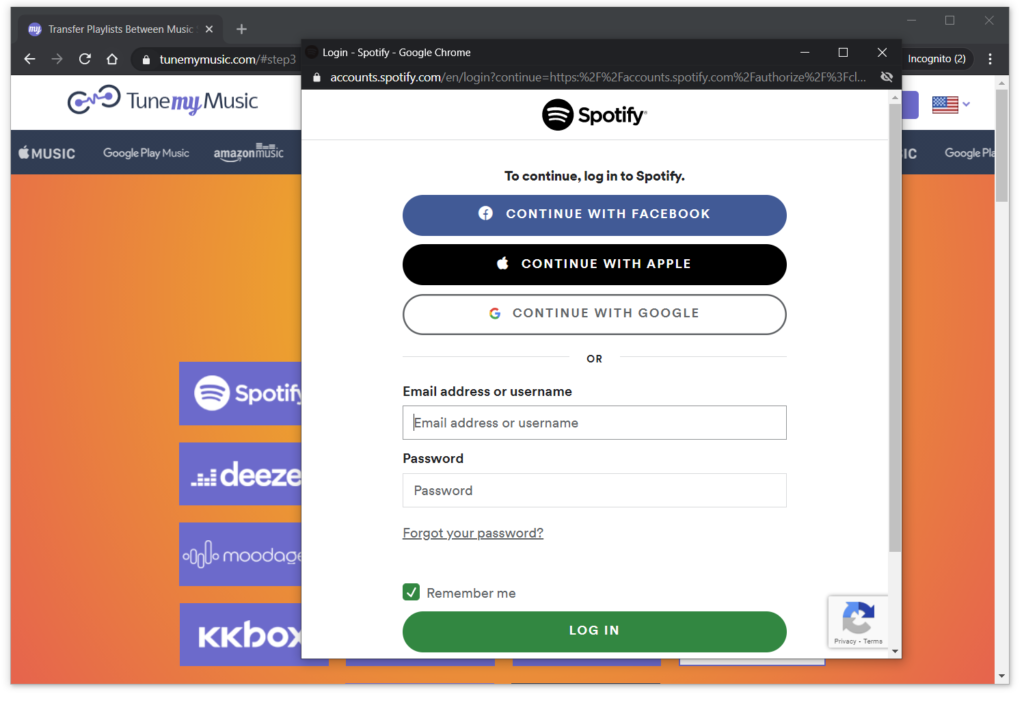
- Now you just sign into Spotify. Don’t worry, this is a direct login to Spotify so TuneMyMusic has no way of seeing your password.
- The Spotify login window will close, and you can see the summary of what is going to happen. Hit “Start Moving My Music” at the bottom to get started.
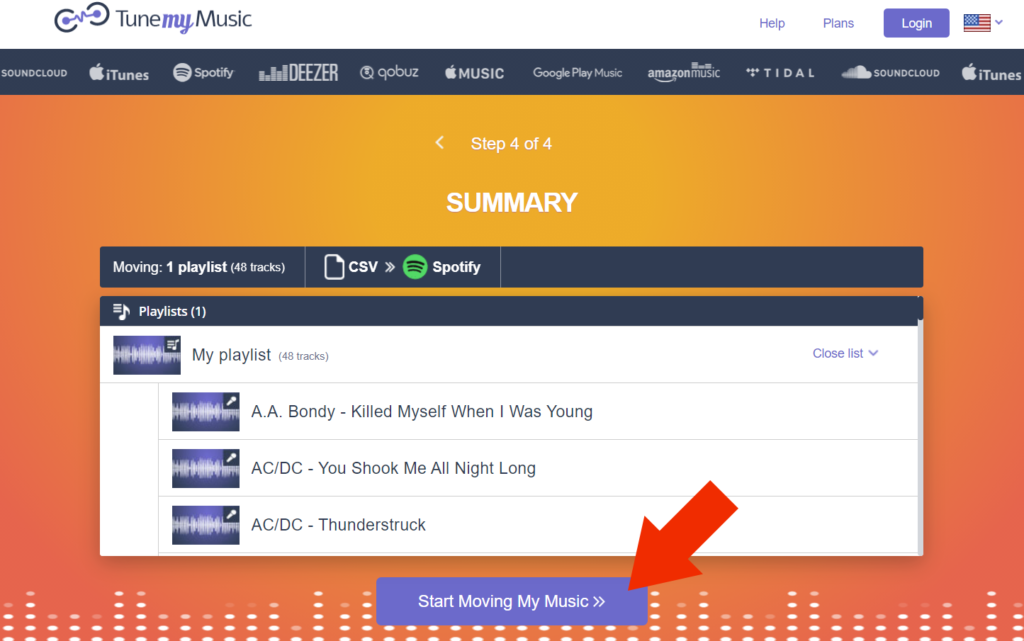
- If you have a very large iTunes library to move over to Spotify this step might take a bit of time.
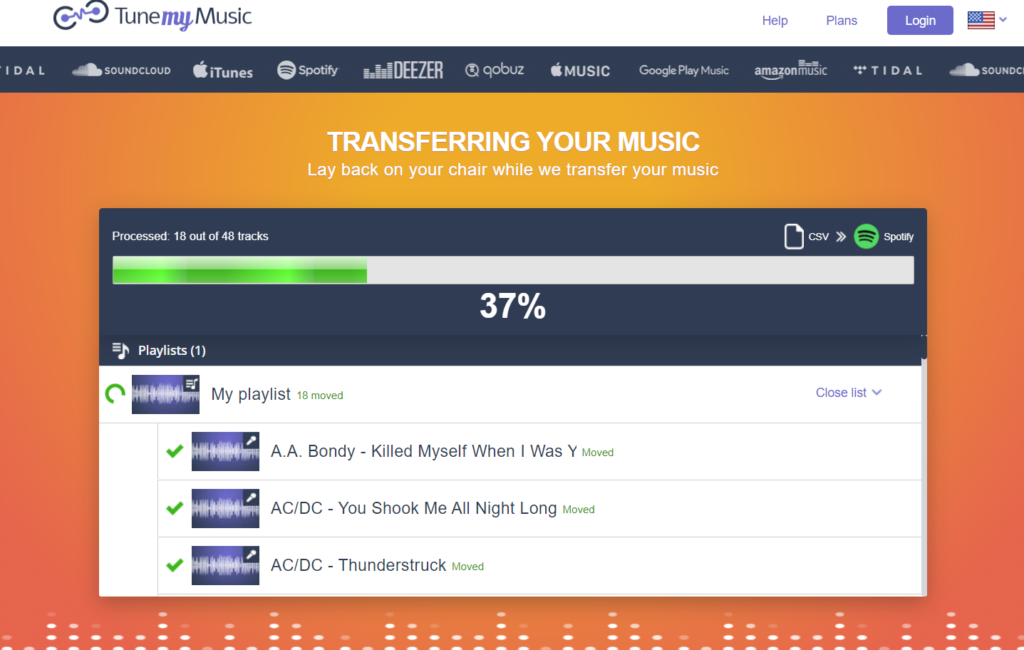
- After that wait, you should get a window that says, “Transfer Complete.” Don’t stop now though! There are a few last steps before you are really finished.
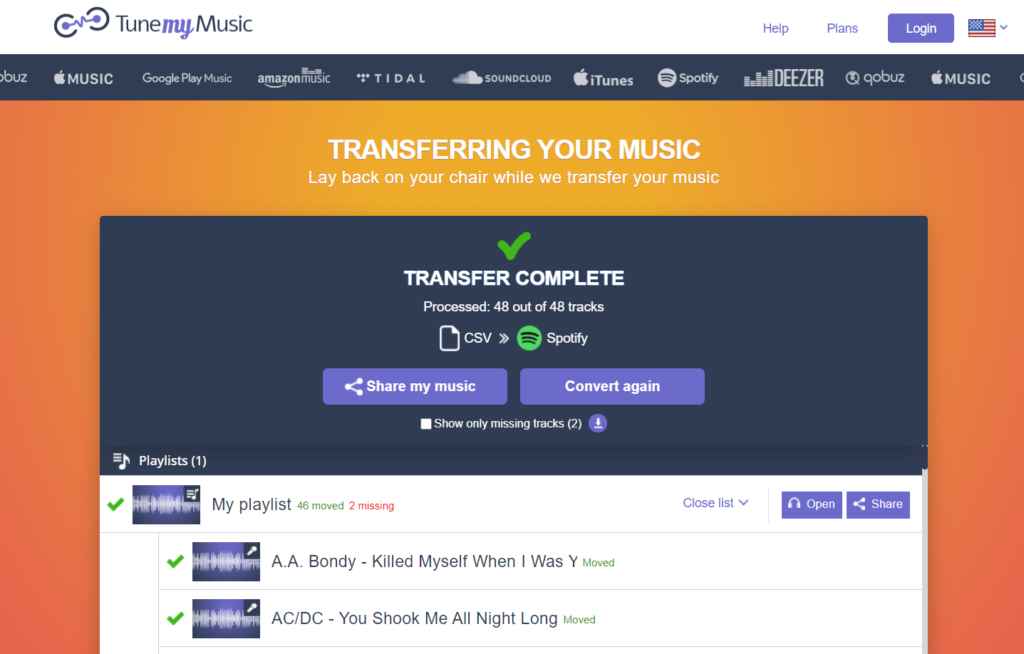
- Most likely not all of your songs made it to Spotify successfully. This happens if they are simply not on Spotify or, your old playlist had some artist / song errors. In my experience tunemymusic.com is pretty good at figuring out minor typos or differences between your old playlist and how Spotify has a song labeled. Major typos might lead to missing songs though.
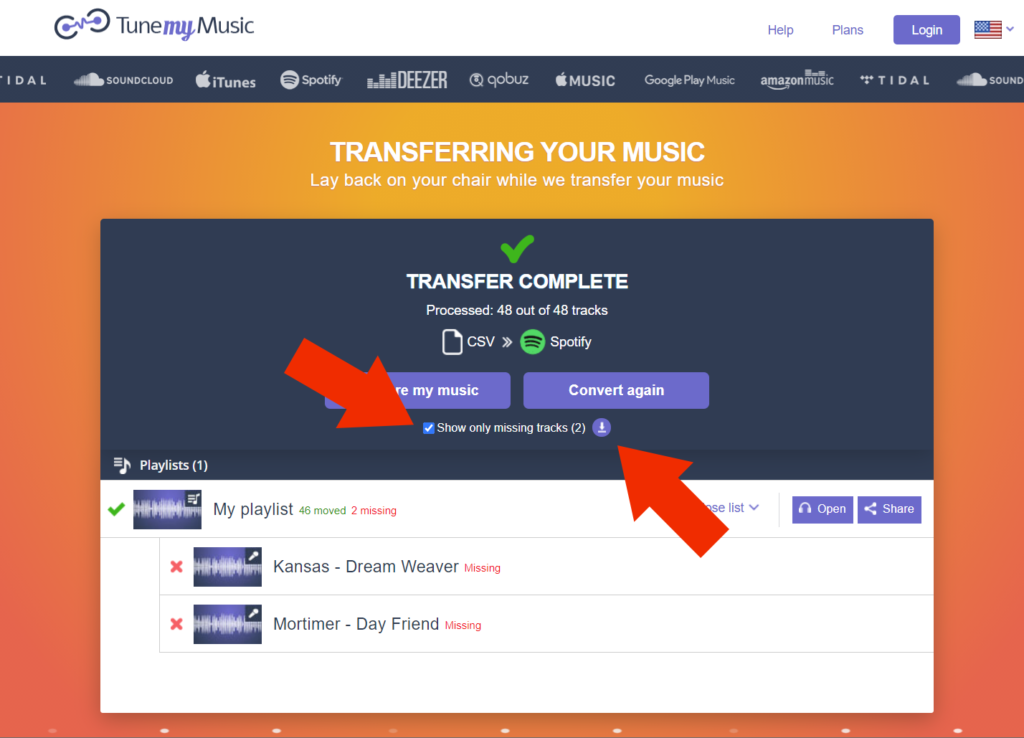
- To see the songs that didn’t import properly, click the little “Show only missing tracks” button near the top. You can also choose to download the list for later.
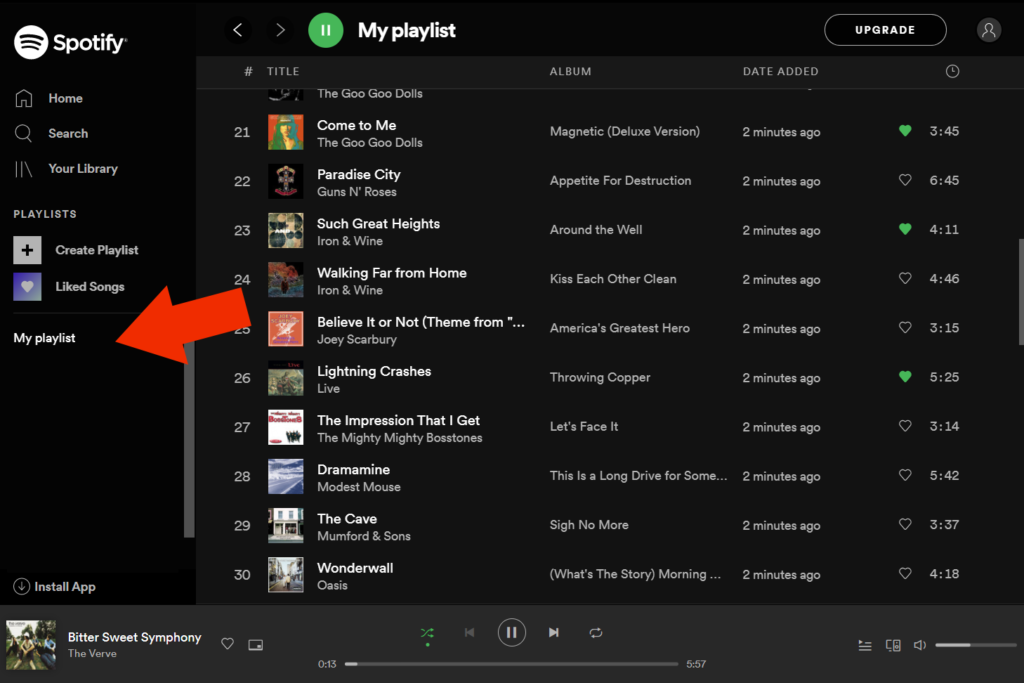
- Now head over to Spotify and under the playlists section you should see your new playlist. It might not be named as expected – mine got called “My playlist.”
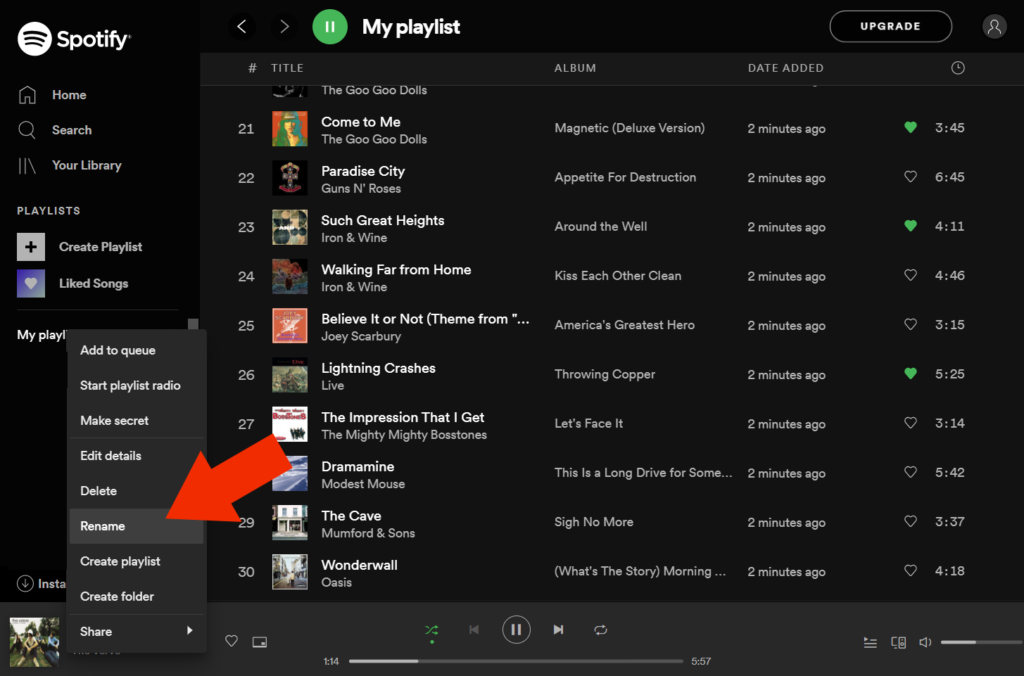
- To rename the playlist simply right click the name and go to “Rename”
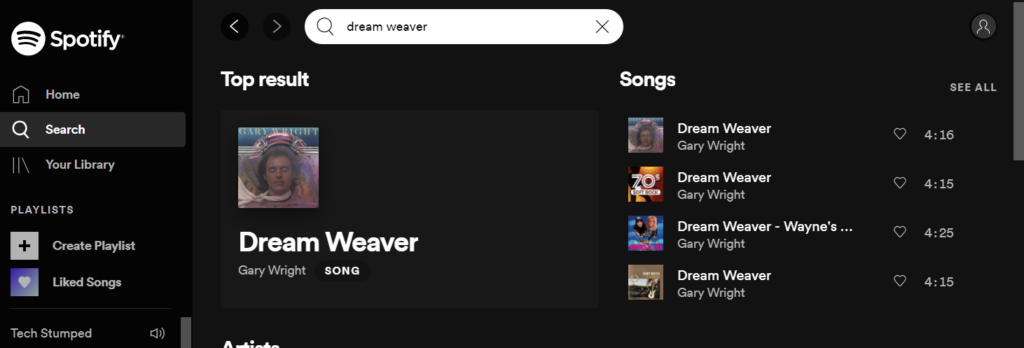
- For the missing songs, you will have to search for them manually. For instance, for the song “Dream Weaver” I had a cover by Kansas in iTunes, but on Spotify I will have to go with the original version by Gary Wright.
- To add a song to your playlist, click the three little dots that appear to the right of the song length when you hover over it.

- Then, select Add to playlist and choose your desired playlist.

- One last thing to do… Listen to the playlist you just imported from your old iTunes library into Spotify!
Enjoy.
This tutorial will also work for importing or rebuilding other offline music libraries and playlists into the popular music streaming services like Spotify, Tidal, Google Music, Amazon Music, Youtube Music, Apple Music, SoundCloud, and more.
The only trick, if not using iTunes, is you will need to find a way to get your old playlist into a spreadsheet then you can follow along from step 8.
